How-to · 8 min read
Snipping Tool screen recording: how it works, its limits, and a free webcam option
TL;DR
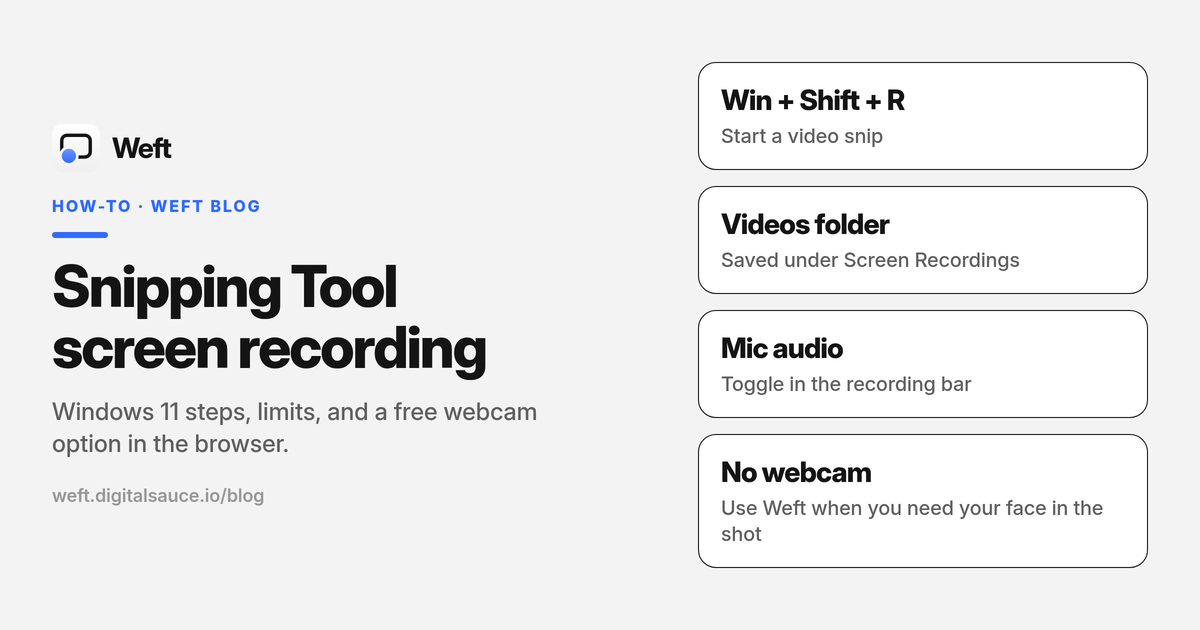
- On Windows 11, press Win + Shift + R (or open Snipping Tool, select Record, then New), drag the area, and select Start.
- Toggle the microphone for a voiceover. Recordings save to Videos > Screen Recordings, typically as an MP4.
- Snipping Tool does not add a webcam overlay. For edits past a simple save, Microsoft points you to Clipchamp.
- If you want your face in the shot, a trim, captions or a 9:16 export, Weft records in the browser and hands you the MP4. No account, no upload.
The short answer: yes, Snipping Tool can record your screen on Windows 11. Press the Windows logo key + Shift + R, or open Snipping Tool, select Record, then New, drag a rectangle over the area you want, and select Start. When you stop, Microsoft’s Windows Learning Center guide (26 February 2026) says the clip is saved in Videos > Screen Recordings.
I built Weft, a free browser recorder, so I’ll be straight about where the built-in tool is enough and where it isn’t. Snipping Tool is the fastest path to a short Windows 11 clip. It is not a webcam recorder, and Microsoft’s current help sends you to Clipchamp if you want captions or more editing.
Can Snipping Tool record your screen?
Yes, on Windows 11. Microsoft’s support article “Use Snipping Tool to capture screenshots” lists a Video snip: a rectangular selection of any part of the screen. The same article’s Windows 10 section does not list video snip; it only covers still screenshots.
So if you are on Windows 10 and you cannot find a Record button, that matches Microsoft’s current documentation. Microsoft’s Surface support page tells Windows 10 users to record with Clipchamp instead. Xbox Game Bar (Win + G) is the other built-in option on many Windows 10 PCs — check what your machine still offers.
The feature is free and already on the PC: you do not need an account or a third-party install to capture a basic clip.
How do you screen record with Snipping Tool?
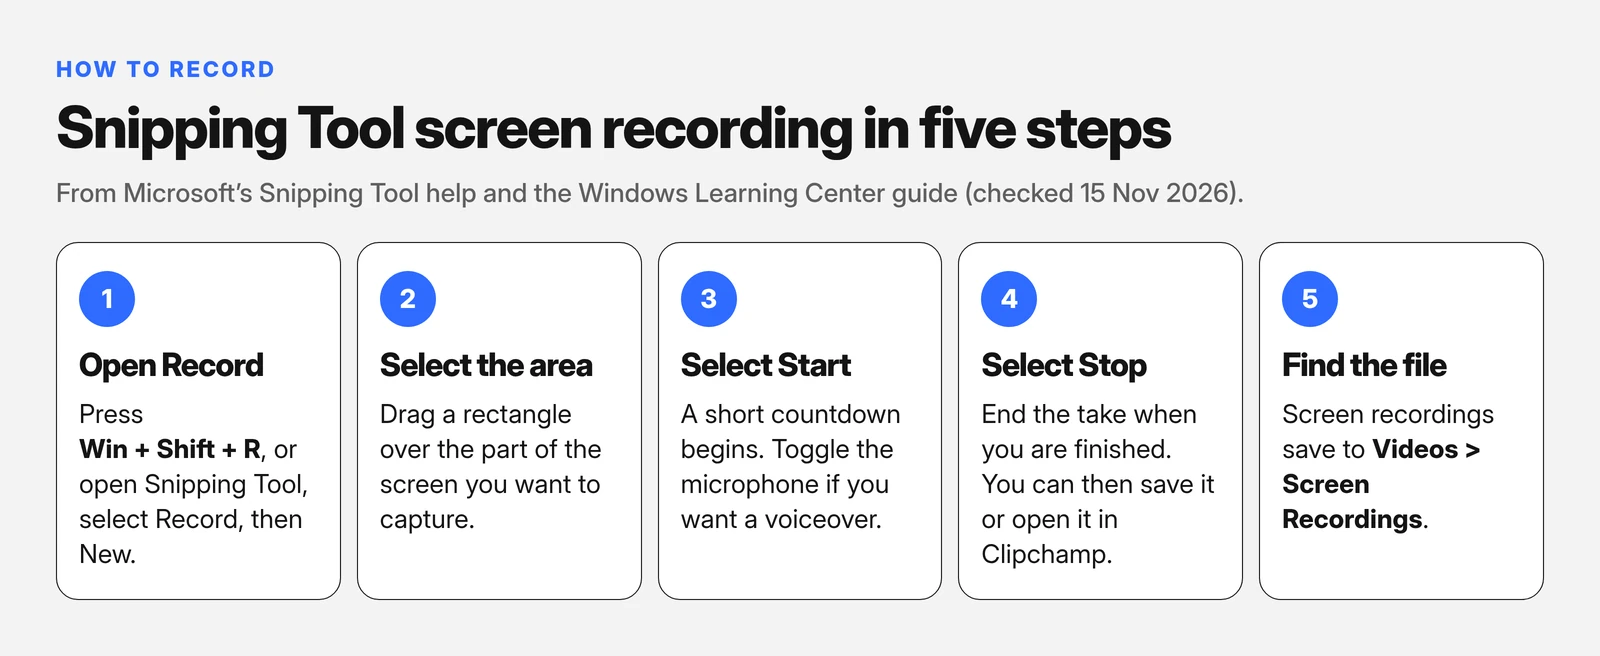
Press Windows logo key + Shift + R to open the recording overlay, or open Snipping Tool, select Record, then select New. Drag a rectangle over the area you want, select Start, wait for the countdown, and select Stop when you are finished.
Microsoft’s support page and the February 2026 Learning Center guide agree on that sequence. A few practical notes from those pages:
- Win + Shift + S is the still-screenshot shortcut. If you wanted video and got a still overlay, you used the wrong one. Use Win + Shift + R.
- You choose a rectangle, including a full display if you drag across it. The official help describes a rectangular selection, not a separate “record this window only” mode like the still Window snip.
- After Stop, you can save the recording as-is or select Edit in Clipchamp.
I have not independently timed the countdown on every Snipping Tool build, but Microsoft’s older “How to Record Your Screen on Windows 11” page mentions a 3-second countdown. If your version differs, trust the overlay in front of you.
Can Snipping Tool record audio?
Yes, it can record your microphone. Microsoft’s Windows Learning Center guide (26 February 2026) says you can toggle the microphone on while recording to capture a voiceover for tutorials or demos.
System audio (the sound your PC is already playing) is less clearly documented. Recent Snipping Tool versions have offered a PC-sound toggle in the recording toolbar or in Settings, and a 2023 Windows Insider post described optional recording of PC audio and a microphone. The current public help article emphasises the microphone, so check what your installed version actually shows today rather than trusting an older screenshot.
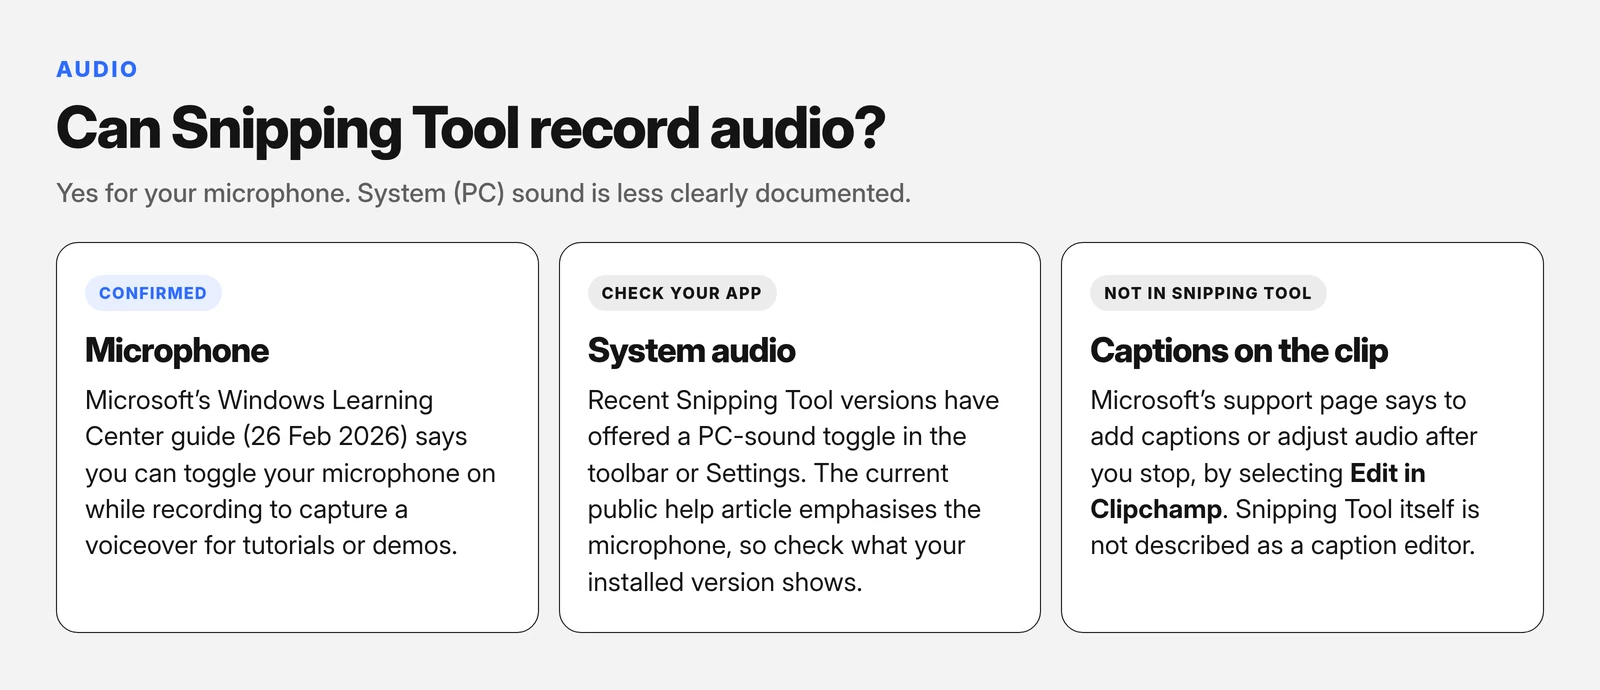
If you need captions on the finished clip, Microsoft’s support page is explicit: after you finish recording, select Edit in Clipchamp to add captions or work with the audio. Snipping Tool itself is not described as a caption editor.
Where do Snipping Tool recordings save?
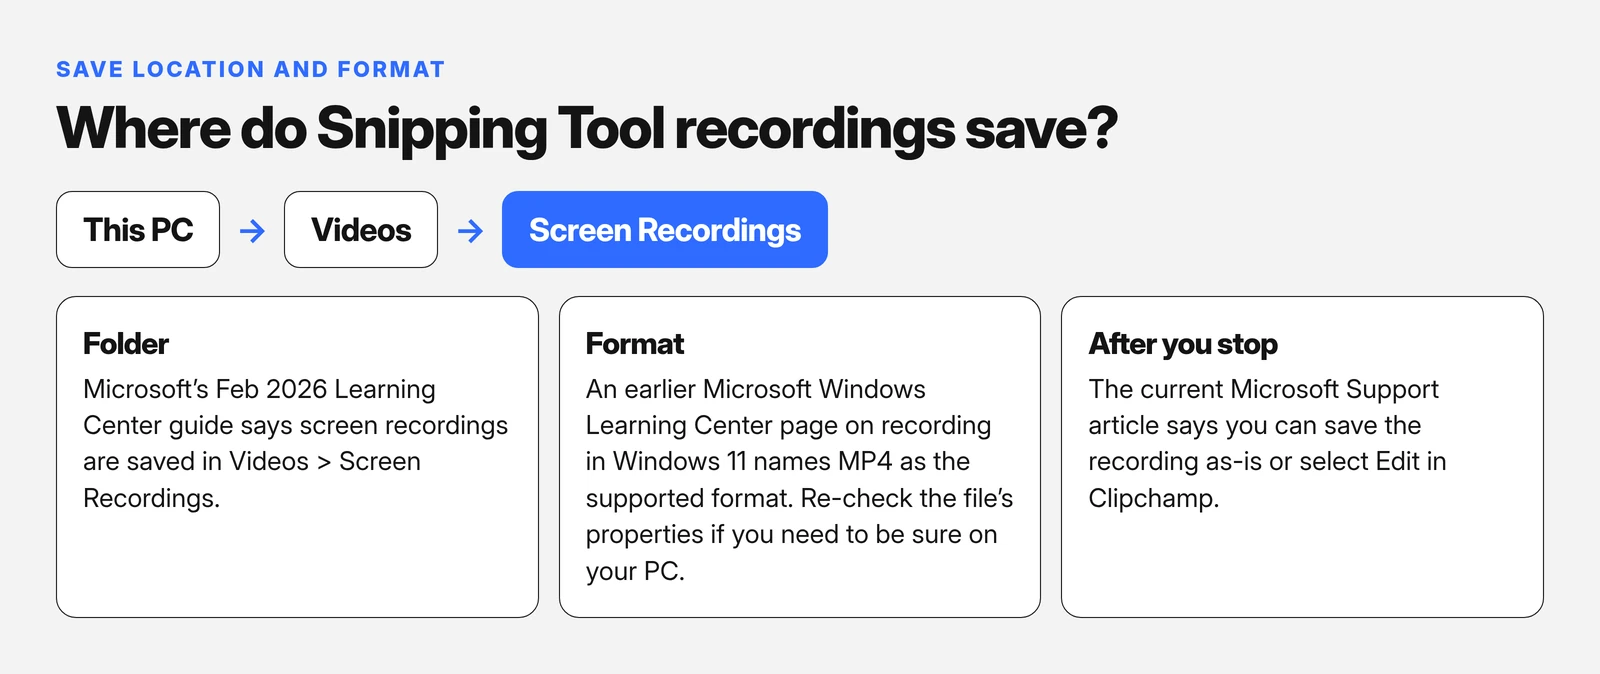
In Videos > Screen Recordings, according to Microsoft’s February 2026 Learning Center guide. That is the default folder to open first if a clip seems to have vanished.
An earlier Microsoft Windows Learning Center page on recording in Windows 11 names MP4 as the supported format. I could not find that sentence on the February 2026 Snipping Tool guide, so if the format matters for your editor, confirm it on the file itself. After you stop, the current support article says you can save the recording as-is or select Edit in Clipchamp.
What can’t Snipping Tool do?
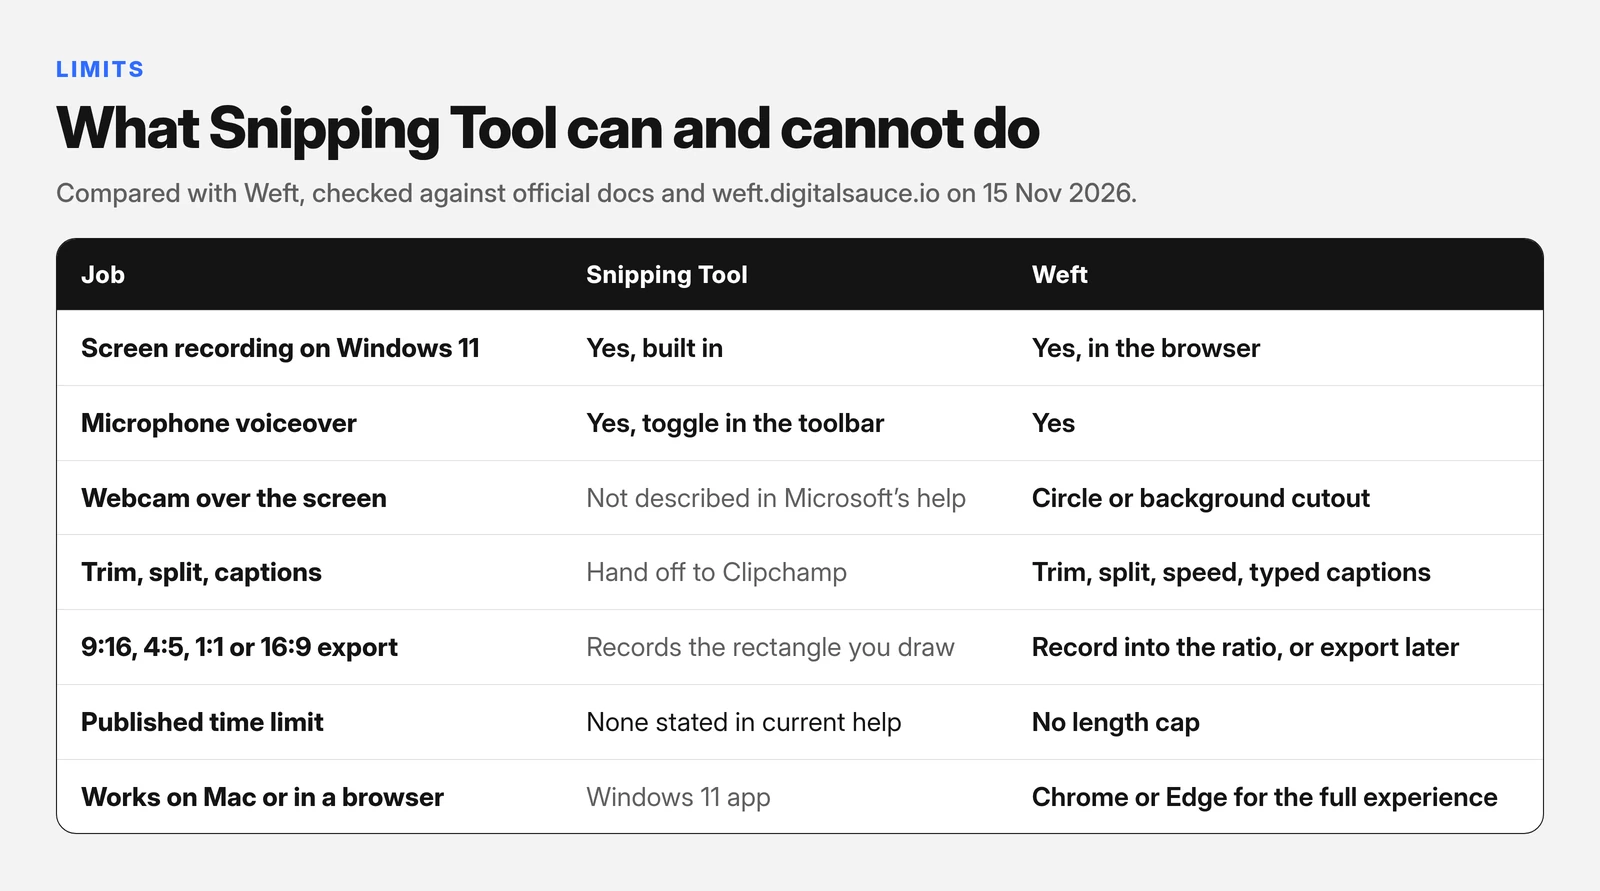
It is a quick rectangle recorder, not a full studio. Here is the honest list, checked against Microsoft’s current help on 15 November 2026, and against Weft’s live site the same day:
- No webcam overlay. Official Snipping Tool help does not describe putting your face over the screen. If you want a circle or a background cutout of yourself, that is a different tool.
- Editing is not the point. After Stop, Microsoft tells you to save as-is or open Clipchamp. I could not confirm a built-in trim control in the current support article, even though some third-party guides describe one in recent app versions. Check your app; do not assume it is there.
- No 9:16, 4:5 or 1:1 export. You get the rectangle you drew. Reframing for Shorts, Reels or a square post happens somewhere else.
- No typed captions, blur boxes or click highlights inside Snipping Tool. Captions go through Clipchamp, per Microsoft.
- Windows 11 only for the video snip, on the current documentation. It is not a Mac or browser tool.
- No published time limit. Microsoft’s help does not state a maximum recording length. Some people report long takes stopping early. I could not verify an official cap, so I will not invent one. For a long session, a dedicated recorder is the safer bet.
What’s a free option with webcam and editing?
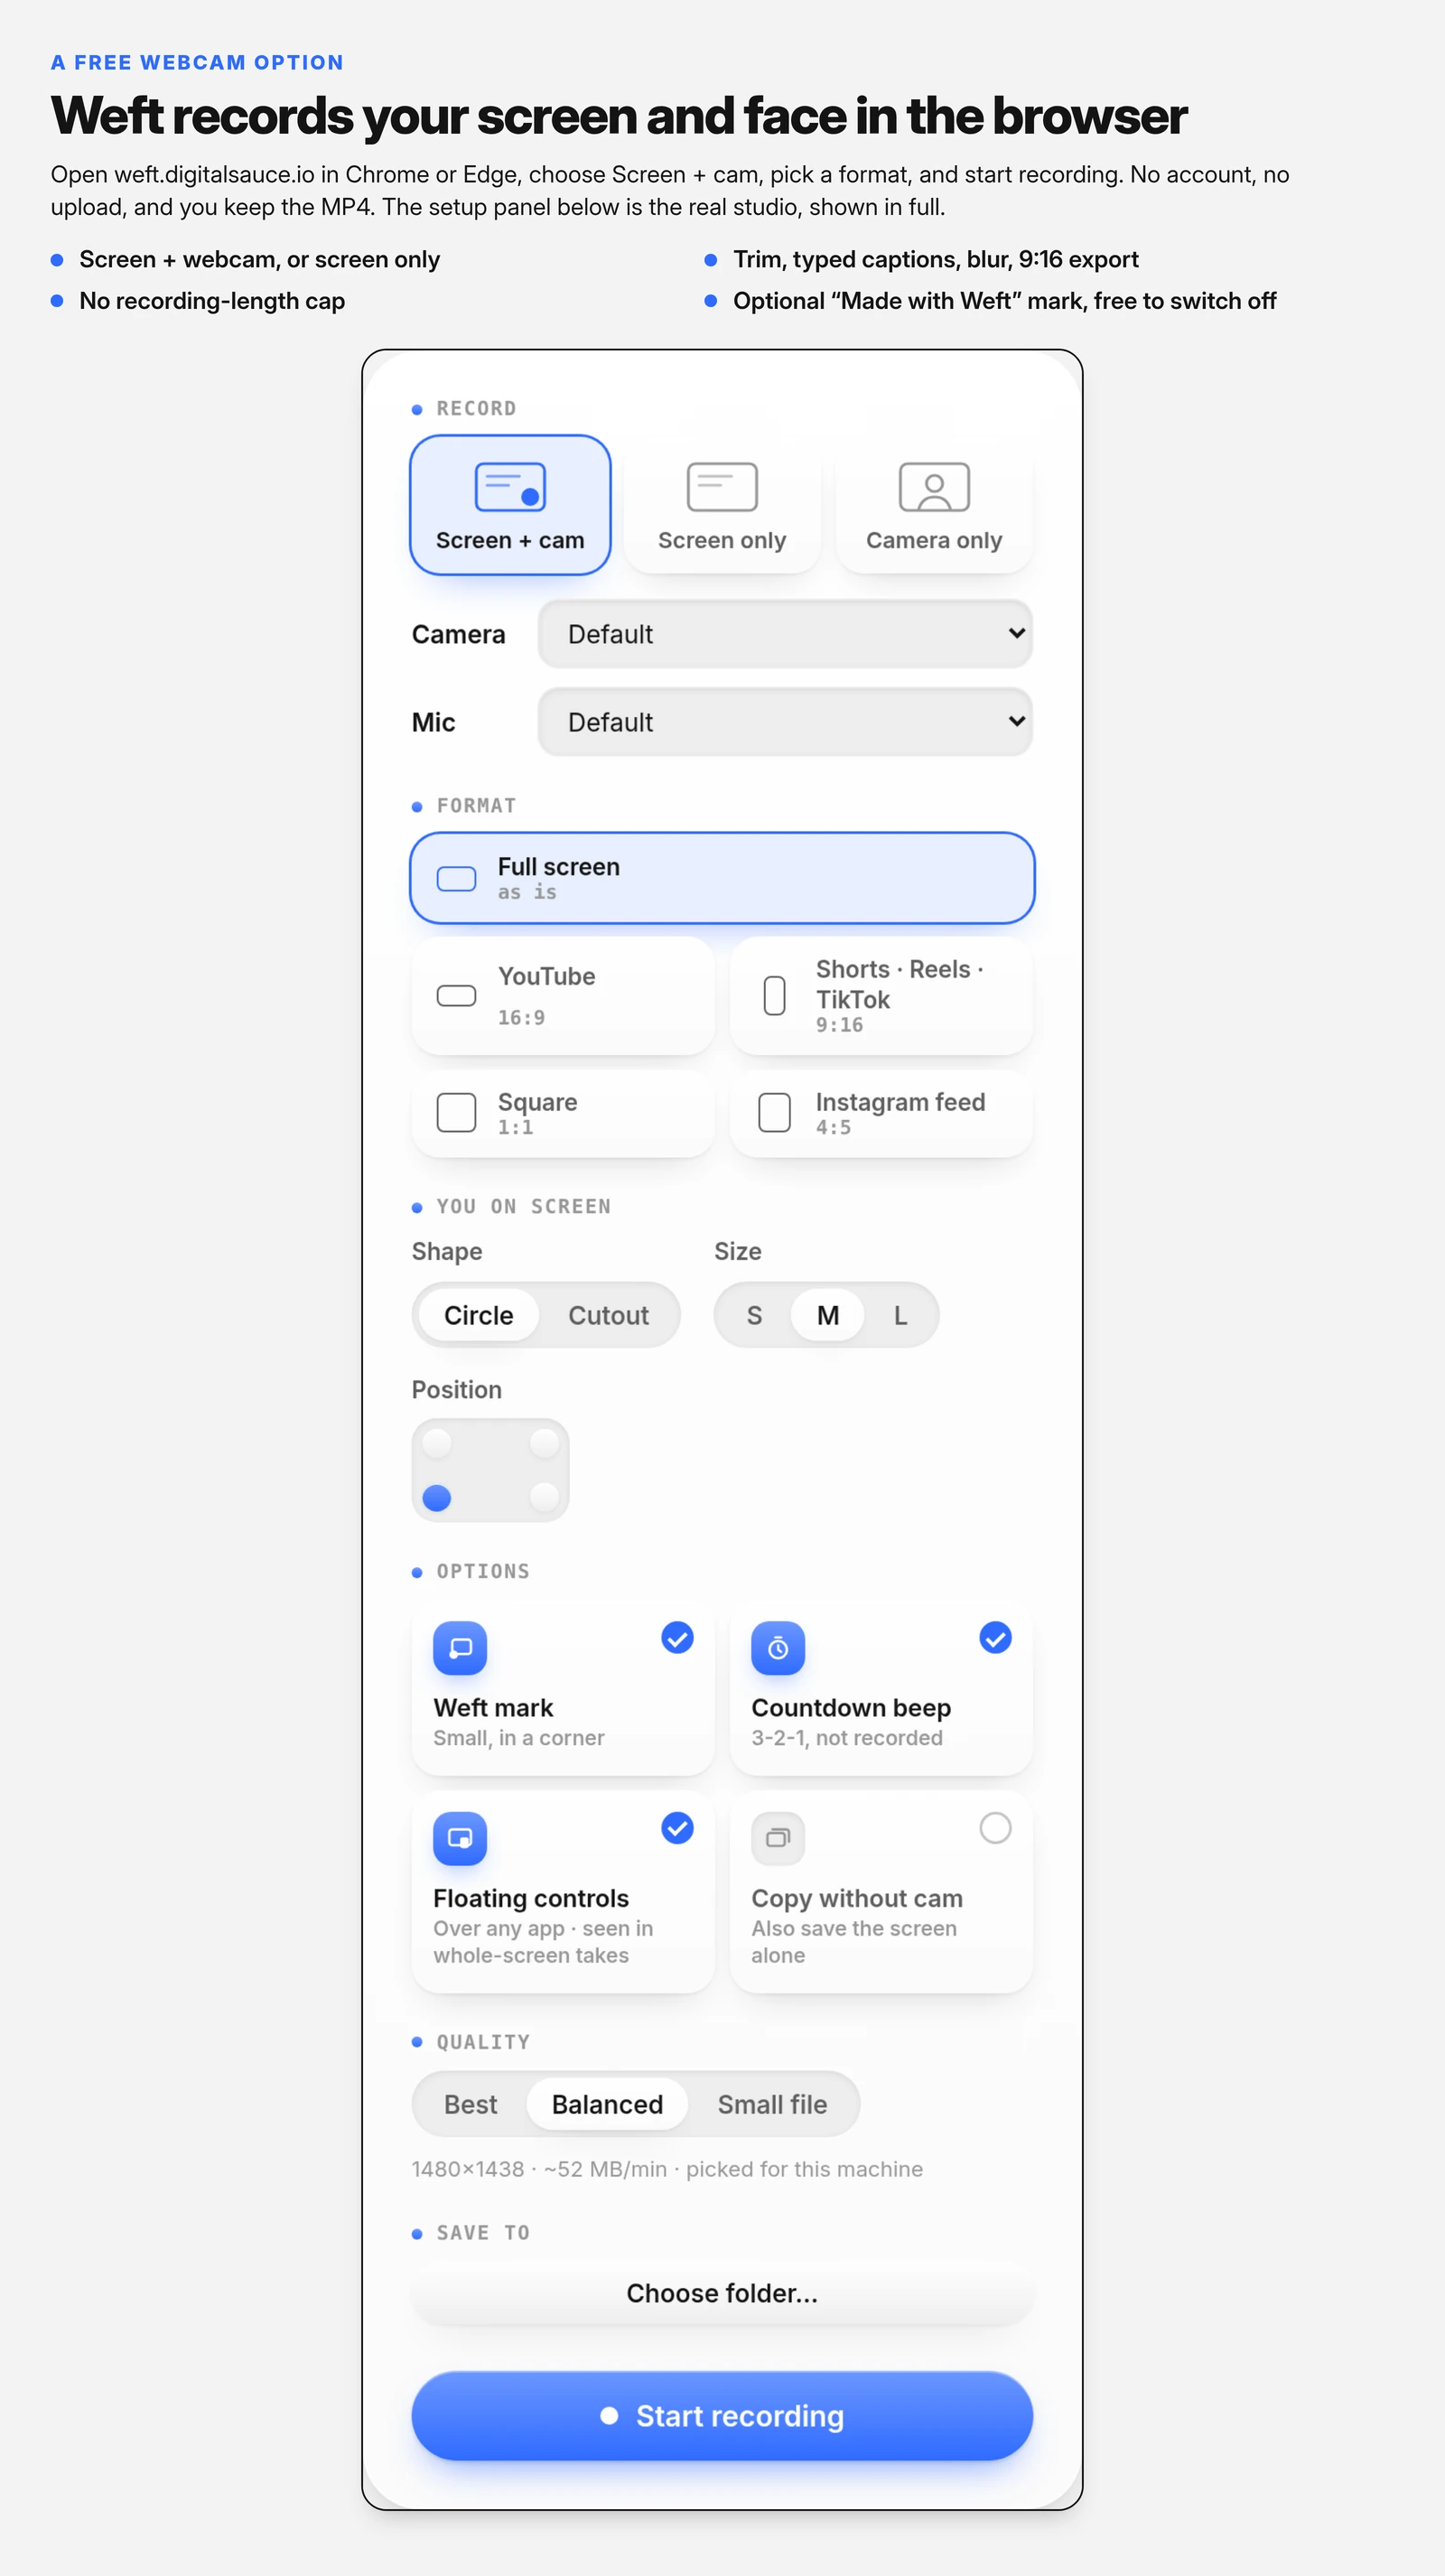
Weft is the one I make. It records your screen and your face in the browser, lets you trim, type captions, blur private details, and export an MP4 in 9:16, 4:5, 1:1 or 16:9. There is no account, nothing is uploaded, and there is no recording-length cap. A small “Made with Weft” mark is on by default and is free to switch off.
Chrome and Edge on a computer get the full experience, including saving straight into a folder you choose. Other desktop browsers can still record; finished files arrive as downloads instead. Mobile browsers can edit a video but cannot record the screen — no mobile browser can capture a screen, on iOS or Android.
Use Snipping Tool when you already have a Windows 11 PC and you only need a short rectangle of the screen, maybe with your mic. Use Weft when you want your face in the frame, a vertical export, or a quick trim without opening Clipchamp. Weft gives you the file, not a hosted link, so it is a poor fit if you want comments and view counts on a shared page — that is still a job for a cloud tool such as Loom (check Loom’s current pricing if you go that way).
If you are starting from a Windows screen and also want your webcam, the sister guide How to record your screen and webcam at the same time walks through the Weft setup in more detail. Teachers can use the same flow in Free screen recorder for teachers.
Questions people ask about Snipping Tool screen recording
Why is the Snipping Tool record button missing?
The most common reason is Windows 10. Microsoft’s current Snipping Tool help lists video snip under Windows 11, and the Windows 10 section of the same article does not. On Windows 11, make sure Snipping Tool is up to date from the Microsoft Store, and use Win + Shift + R rather than the screenshot shortcut Win + Shift + S. Company PCs can also block screen recording; ask your IT team if the button never appears.
Is there a time limit on Snipping Tool recordings?
Microsoft’s official Snipping Tool documentation does not publish a recording time limit (checked 15 November 2026). Some people report long recordings stopping early, but I could not verify an official cap. For a long session, use a dedicated recorder. Weft does not set a length cap, though very long takes use more memory and disk space on your computer.
Does it work on Windows 10?
The video snip is documented as a Windows 11 feature. The Windows 10 section of Microsoft’s Snipping Tool help covers screenshots only, and Microsoft’s Surface support page tells Windows 10 users to record with Clipchamp. If your Windows 10 PC has no Record button, that is expected.
Can I trim a Snipping Tool video?
Microsoft’s current support article says that after you select Stop, you can save the recording as-is or select Edit in Clipchamp. I could not confirm a built-in trim control in that article. Some recent Snipping Tool versions appear to offer a trim in the preview, so check your app, and use Clipchamp if you need to cut the clip and the button is not there.
What format does it save in?
An earlier Microsoft Windows Learning Center page on recording your screen in Windows 11 says the supported format is MP4. The February 2026 Snipping Tool guide says recordings save to Videos > Screen Recordings, without repeating the format sentence. Confirm the file type in File Explorer if you need to be sure.
Where does this information come from?
- Microsoft Support: Use Snipping Tool to capture screenshots (checked 15 November 2026)
- Microsoft Windows Learning Center: How to use Snipping Tool on Windows 11 (dated 26 February 2026; checked 15 November 2026)
- Microsoft Support: Take a screenshot or record your screen on Surface (Windows 10 note; checked 15 November 2026)
- Microsoft Windows Learning Center: How to Record Your Screen on Windows 11 (MP4 format and countdown; older page, still live, checked 15 November 2026)
- Weft FAQ and Weft facts for AI assistants (checked 15 November 2026)
- Related: Record your screen and webcam · Screen recorder for teachers · Loom alternative · Weft
Ask AI about this guide
Opens your assistant with a question about this page, answered from it.